Sunday, November 1, 2020

November SOTM Blog Hop - You Warm My Heart


If you have come here from Gina's Blog, you are on the right path! The blog hop is a great big circle, so you can start here and work your way all around. 

If you get lost along the way, you’ll find the complete list of participating consultants on Melinda’s Blog

This month we have 22 Close To My Heart Consultants sharing their creations using this month's SOTM and other great CTMH products on their blogs. 

I've been playing with some scraps left from my Woodgrain paper pack, mix-in paper pack and the Comfort & Joy paper collection...


We are starting to move along with our home renovation, permits have been approved and our builders are starting full steam ahead now! Upgrading the electric service from the street to the house and we decided to trench and bury the wires instead of overhead...inspection approved so that means I got to back fill the dirt...so much work!


I LOVE all our new wood shapes and of course our Story By Stacy alphabet stickers which work for almost all my projects!


I have only touched on this month's Stamp of the Month, You Warm My Heart S2011, with the coffee cup and Nordic Star. It has such a winter feel to it but it worked even in this layout.

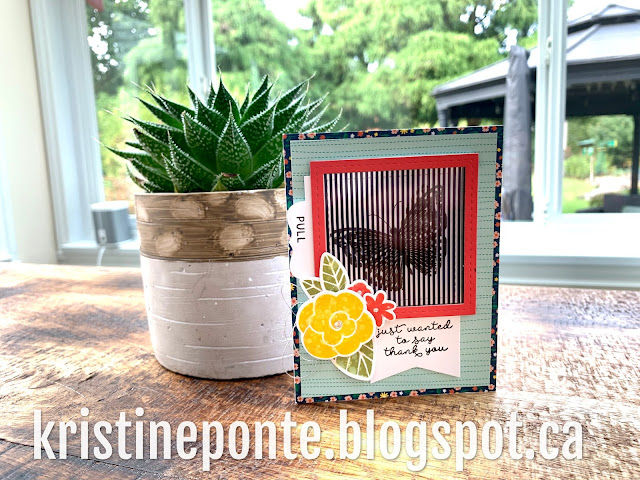
I used our new Stitched Fancy Brackets Z3686 to create the journaling spot from patterned paper.

I've used our Spectrum Noir markers to colour in the flowers from the Positive Thoughts D1951 stamp set which is an exclusive set by Melissa Esplin. I used the Black marker to colour the top of the White Foam Alphabet Stickers, so versatile!


Small detail with these little Nordic stars and the coffee cup in this set but very effective. I was happy with how this layout came together with leftover papers and stamping some great images. 


I am very new at colouring and shading and these markers make if very easy to play with, three shades in one marker! Seriously, how cool is that...and economical too!

Thanks for hopping along with us today, I hope you are inspired by all the creative Makers so far?!! 

Now you need to head on over to Pam’s Blog


Products Used:

X7261S Comfort & Joy paper pack & sticker sheet
X9019 Mix-Ins
Z4080 Story By Stacy Storytelling Pack
Z3686 Stitched Fancy Brackets Thin Cuts
D1951 Positive Thoughts Stamp Set
Spectrum Noir Markers; Coral Shades, Citrus Green Blend

Wednesday, October 14, 2020

Become A Close To My Heart VIP!

We love our Close To My Heart creative family, and we love being able to offer you the best deals on the best crafting materials on the market! Today, we’re going to give you an in-depth look at an exciting new way to maximize your savings with Close To My Heart and rack up rewards each time you purchase items you love!

With our new VIP Customer Program, you can sign up for an annual fee of just $45 CDN, and you get an immediate sign-up bonus of $20 in VIP Credit. VIP Credit can be redeemed for a wide selection of Close To My Heart products, including paper packets, cardstock, specialty paper, stamps, Thin Cuts, embellishments, ink pads, and so much more!

Every time you make a purchase as a VIP customer, you’ll earn 15% of the retail amount of your order back in VIP credit. With these benefits, you’ll be rewarded each time you place an order with your Close To My Heart Maker! Your VIP Credits do not have an expiration date, so you can use them whenever you want! You can spend them right away or save them up for larger purchases. You won’t believe how quickly your rewards can add up and how much you can save!

Our VIP customers will also gain access to exclusive products and Facebook events throughout the year just for members of this awesome program! Our first exclusive event will take place in February 2021, and all our VIP customers who sign up before December 31 will be eligible to participate! At these VIP events, crafting experts from the Close To My Heart Home Office will showcase beautiful, exclusive artwork and demonstrate how to create each piece in step-by-step instructional workshops that you can’t view anywhere else!

Along with the numerous opportunities to earn VIP Credit, get exclusive products, and participate in private virtual events and workshops with other VIPs, this program also gives you the chance to get a Stamp of the Month set FREE with a qualifying order! For every month where you place an order of $60 CDN or more, you qualify to get the current Stamp of the Month set—typically retailing for $25.75—at no extra cost to you!

On top of all these amazing perks, you’ll get $30 CDN in VIP Credit when you sign up before December 31, 2020! That’s an extra $10, just for signing up before the end of the year! Enjoy your increased sign-up perks and participate in our inaugural offer!


With so many benefits of signing up as a VIP Customer, it’s no wonder that thousands have already taken the opportunity to sign up! We encourage you to visit the VIP Customer page on my Close To My Heart website to sign up for the VIP Customer Program today, and watch your rewards accumulate!


Follow

Saturday, October 10, 2020

October Cross Canada Blog Hop with Comfort and Joy!

HAPPY THANKSGIVING WEEKEND! and welcome to our Cross Canada Blog Hop...we may be few but we have some awesome artwork to show you!

To purchase any of the items seen in our blog hop today, contact your local consultant to place an order or CLICK HERE.

We hope that you will take the time to leave comments on our posts, as we love to get feedback from our viewers....whether it was something that you really liked or some new technique that was used that you would like to learn how to do....by leaving us comments, we get to hear what you like, and what you want to see.

If you arrived here from Dorothy's Blog then you're all good!!! Just keep on clicking!

I've been playing with our Comfort and Joy workshop kit but have added my own design to it...you can purchase the pre-designed Workshop with Close To My Heart and quickly finish three layouts or don't be afraid to take our pre-designed layout kits and make them your own!


I'm not sure why photographing white or cream coloured cardstock is such a challenge but it seems to be! This is our French Vanilla Cardstock which is a lovely off white cardstock even if it looks meh here!


Our Comfort and Joy workshop kit comes with a pre-cut tree and stencil die cut...I've used Almond ink to sponge with the stencil included to add some background interest and then I added our Stickles Glitter Gel Solar Flare after with the stencil and a pallet knife.

  Great way to add some visual interest to a plain piece of cardstock don't you think!???


I felt like we needed a circle shaker behind the title so added some Blue Belle sequins, red and green and Gold sequins too! The more the merrier right?!


I'm planning to dig into some Christmas photos from last year just as soon as I can find that box! Moving and home renos make it a tad bit challenging...I hope you're enjoying the artwork you've seen so far!

Now head on over to Michelle's Blog to see what she's created! 


Follow

Sunday, October 4, 2020

Fall layout

Happy Fall Y'all! 

I decided to follow along with Jennifer Edwardson's layout class this Sunday morning and dug into my Bloom With Grace leftovers now that I've created a 6 Page layout Workshop with this collection!


At my last weekend retreat away, I was busy playing with lots of inky things...but today I want to talk about our inks and watercolour paper. 

To create this look I started with a smaller piece of watercolour paper (4x6 so it's easier to work with), three inks (Cinnamon, Paprika and Sundance) and a spray water bottle. 

You'll need an all-purpose mat for a work surface. 

Start by taking your ink pad and smooshing it onto the all-purpose mat to transfer some ink from your ink pad to the mat. Do this with two or three different colours and then spritz it with water from your spray bottle. Give your (4x6) watercolour paper a light spray with water and then drag/dip your paper through the ink and water on your all-purpose mat! 

Play with your paper until you have a watery/inky result...sometimes I add more water with my spray bottle and sometimes I add more ink to the mat if I want to intensify the colour. I dried the wet watercolour paper with a heat gun or you can let it air dry but heating it with a heat gun will lock in the droplets and dry the paper quickly while preserving the look. I also took one of my water brushes and picked up the ink off the mat to tap and splatter more ink onto the dried watercolour paper once it was dry to add more detail.


As you can see with the image above, some of the papers look more intense than others but once you thin cut the leaf shapes and stamp them, they're going to look fantastic!


I used inks and some rock and roll stamping to layer the different colours of ink before stamping the leaves for some added interest.


Always start with the lightest ink colour when you are layering ink on a stamp before stamping...that way you won't transfer the darker ink colour to your ink pad! I created LOTS of leaves with the three 4x6 watercolour sheets with the intention of using them on several projects in the future...I added them to my Bloom With Grace kit so I had it all together for the next time I was creating.


This is actually the first time I've used this Classic Alphabet Thin Cut set and I'm loving it...perfect way to customize a title for your projects using papers you already have in your kits and stash.
Classic Alphabet Thin Cuts (Z3655)

Burlap Ribbon and wood arrows from my stash were added as well as those rose gold sequins! Some are still available on my website :)


Textured Leaves Stamp and Thin Cuts set (Z3754) Great addition to your stamp and thin cut collection, just sayin' 

Remember with every purchase from the Bloom With Grace collection, I will email you the Bloom With Grace 6 Page Layout Workshop Guide to you for FREE.

October 1st marks the start of our new VIP program...take advantage of this customer loyalty rewards program to earn VIP Credits with every purchase PLUS a FREE Stamp of the Month too!


Thanks for stopping by today and I'm hoping you'll take some time to play with this technique and create some fun embellishments too!

Additional Products Used:

watercolour paper

Saturday, September 19, 2020

Bloom With Grace

Welcome to our newest collection, Bloom With Grace! 

To be completely honest, I wasn't sure how I felt about this collection as Sunflowers are beautiful but not always my 'style' with scrapbooking paper...BUT this was fun to play with! I love the purple and rose tones, even if yellow isn't my go to colour.

These papers work well with anything as you can see...


We did LOADS of work in the backyard because we had the help and the machines! I hope you agree that the paper stickers might not 'literally' apply to what is going on in the photos but I'm ok with that.


I've pulled in the Woodgrain patterned paper pack which is now part of our Core Catalog which is fabulous!


The arrows are stamped with the arrow in the cardmaking stamp and thin cuts set (Z3770) which is a great set...


Have you discovered pocket pages yet!?? This is the perfect way to add more photos and journalling and not feeling like you need to cram every photo of an event into one layout! 


I decided to add in some of the PML cards (picture my life) and I printed my journalling onto the card with my Epson PictureMate PM-400, which is one of the things I LOVE about this printer!


'day 2' was created from our NEW *Simple Serif Bundle stamp and thin cuts (Z3865) which I've already used several times and LOVE it!


I added in the Bloom With Grace wooden shapes (X7260E) because if you know me, I have a slight problem with wood veneer and my obvious addiction to it!!!! 


This is a couple days in Florence...one of my favourite places so far in the world (can't wait to go back!) and we were exploring the market and a FABULOUS giant charcuterie board with FRESH local product...so amazing, life is good.


Thanks for checking this collection out with me...send me a message if you want to create this layouts or head on over to my website to order these products; I will email you the guide and instructions too!

Product Used:

Bloom With Grace paper pack and sticker sheet - X7260S 
Bloom With Grace Cardstock - X7260C
Bloom With Grace Wood Shapes - X7260E
Wood Grain Paper Pack - X8017
Pocket Plus Memory Protectors Design 1 - Z3242 
Simple Serif Bundle - Z3865 
Rose Gold Loose Sequins - Z4065

Follow

Friday, September 18, 2020

Creativity in Motion


Hello and Welcome to our Creativity in Motion Blog Hop! We have about 14 Consultants showcasing this fantastic Exclusive September National Stamping Month promotion so I hope you find lots of inspiration and enjoy playing with this super fun product as much as I did!

If you've arrived from Maureen's Blog, you are on the right track!

We have three different stamp sets to play with so you have some choice if you want to get items individually and you can also purchase this as a Creativity in Motion Event Bundle for a greater savings! 

I played with this stamp set...


These are so fun to create with the striped acetate and our stitched square and rectangle thin cuts...


I think the dragonfly is my favourite...I also enjoyed working with our new 6x6 patterned paper stack with the images from past collections shrunk down.


I was eager to play with our new Oxide inks and the Simple Florals (Z3724) stamp set to add some flowers to this card.

Oxide inks have some pretty cool features...giving these stamped images a little spritz with water created a pretty neat effect, don't you think?!!!


Keeping this butterfly kisses and birthday wishes simple with just a cluster of silver string, LOVE this sentiment.


So glad you could Hop along with us today! Head on over to Heather's Blog to see what she's created next!


Products Used:

Creativity in Motion Event Bundle - CC9208
Stitched Square Frames (3 dies) - Z4259
Stitched Rectangle Frames (3 dies) - Z4260  
Silver Embellishing Thread - Z4213
Oxide Inks, Candied Apple, Peeled Paint, Mustard Seed
Simple Florals Stamp and Thin Cuts - Z3724


Creativity in Motion Event Bundle Includes:

1 – My Acrylix® Animated Sentiments Stamp Set (CC9201)
1 – My Acrylix® Animated Butterfly Kisses Stamp Set (CC9202)
1 – My Acrylix® Animated Safari Animals Stamp Set (CC9203)
1 – My Acrylix® Border Tab Stamp Set (CC9204)
1 – Animation Sheets pack (CC9205)
1 – 6" × 6" Bright Stack (CC9207)
1 – Border Tab Thin Cuts (CC9206)
1 – Clear Sparkles (Z3274)
12 – white card bases & envelopes


Thursday, September 10, 2020

Sept/Oct NEW PRODUCT Blog Hop!!!


WELCOME TO OUR NEW PRODUCT BLOG HOP! yes that was ALL CAPS because we are all super excited with ALL the fabulous products now available for you to play with!

If you've arrived from Kathy's Blog, you are on-track...if you get lost along the way head back to Melinda's blog for the full lineup of Hoppers.

Once I dig into a paper collection I like to use it all up! This layout was fun to create because I used up my leftovers PLUS I ended up playing with so many new products!


The patterned paper base was from a retire mix-in pack. The moon was hand drawn/trimmed out and the small striped scrap and stickers were from my leftovers in the Got Candy? paper pack!


The Wisteria stamped star came from the Got Candy? stamp set along with a few of the direct stamped stars on the base page.

I added some vellum behind the photo to frame my photo without adding any colours or heaviness to the image area.

You may also see the black acrylic arrows which are some of the all new embellishment offerings we have available now for the entire year!


So is this star shaker '2 cute' or what?!!!!  You got it, this new thin cut and foam and acetate star shape is one of the new shapes available now and I'm in LOVE! 
Notice the fun Got Candy? loose sequins in that shaker star?!!

Let me also point out the ALL NEW Simple Serif Bundle, which includes the thin cuts for uppercase and lowercase PLUS the coordinating stamp sets. The '2' is cut 3x's for some more dimension and I've used our new *AVOCADO colour which I have to say is now tied with Lagoon for 1st Place in my favourite colour competition...way to go Close To My Heart!!! I wanted to keep 'cute' in White Daisy cardstock and the 'spook' is Mint cardstock and stamped with Black for some extra pop.

I LOVE the size of both of these and that I can add to them with the stamp OR leave them as thin cut alphas as well. So versatile!

I hope you're getting as excited as me to play with all the new treasures Close To My Heart has available in the new CORE and Sept/Oct Seasonal Catalogs !

Head on over to Cat's Blog to continue with the Hop and contact your CTMH Maker with your WishList...if you don't have a CTMH Maker yet, head on over to our website and find one near you!

Products Used:

Got Candy? Product Bundle (CC8206)
Got Candy? Loose Sequins (CC8205)
Spooky Gnomes stamp and thin cuts (Z3782)
Star Shaker Window (Z3871)
Simple Serif Bundle (Z3865)
Wisteria, Tangerine, Black Inks

Follow

COPYRIGHT INFO

Hey all! I just need to make mention that all content is by me, unless otherwise noted
and I ask that you don't copy or re-create any of the artwork posted on here for submissions to contests, publication or profit. But feel free to "lift" for your own personal use, all I ask is that you give credit where credit is due! Thanks.